Written by Reiko
Agent 5 Journal #4: "I'm almost done. All three robots are destroyed, and now the last thing to do is to catch up with Elliot Sinclair. My impression of him is that he's unstable and very dangerous. I was almost flattened by his robot, after all. He may be a genius, but his intelligence does us no good if he's going to interfere with the history that he helped make accessible."
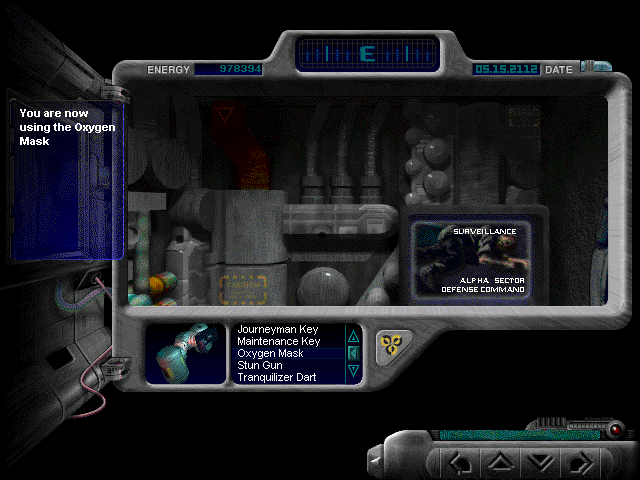
Only one mission left to complete, and we come full circle back to where we started. For the second time, I jump to the NORAD base in 2112. This time, after the robot taunts me, I immediately put on my oxygen mask, and I'm no longer gasping or in any danger from the sleeping gas. I look around again, but this time I'm more careful about what I touch.
 |
| Those people didn't have oxygen masks handy... |
To my left, there's a screen that shows me various areas around the base. I can tap through to see a wireframe layout of the base, and then I can see what look like feeds from surveillance cameras in various sectors of the base. One sector seems to have a large mechanical arm of some kind. One feed from Alpha sector seems to have some people passed out, presumably because the sleeping gas has permeated the base.
 |
| This plasma isn't hot enough to kill...? |
I don't see anything else to do in here, so I open the door and step forward. Immediately I get a warning that I detect "plasma field buildup." That doesn't sound good. I turn to face the corridor and see the robot at the other end of it, shooting some kind of weapon at me! It shoots two or three times, and the projectiles look like large balls of fire, but it doesn't kill me; it just knocks my energy down by about 25%.
Later, when I replay, I make sure the Shield BioChip is active before I step out of the room, and that seems to help somewhat. I think I only lose about 10-12% of my energy instead. So maybe the shield absorbed half of the damage.
I figure out that I've arrived in Beta sector, and I can move around in the corridors between a few of the sectors. But many doors refuse to open due to a security alert, including the door that closed behind me, so I can't get back into the first room to look at the screens again. I was going to see if I could determine where the robot went.
 |
| I can see the robot, but I can't get to it. |
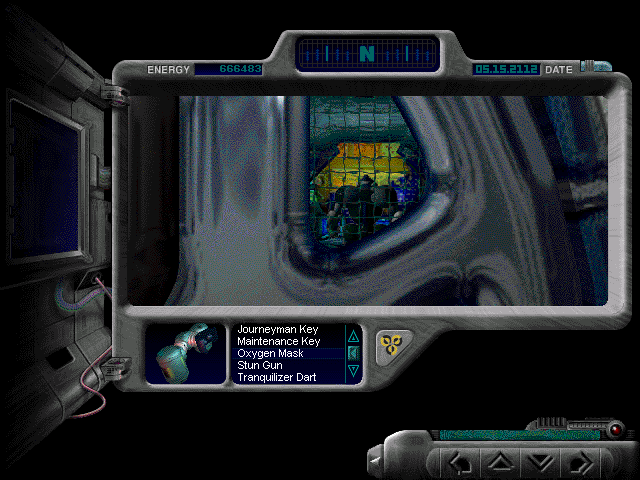
As it turns out, it's not hard to figure out where the robot went. The other end of the corridor ends in a cross-corridor with a door at the end. The left turn ends at a door into Alpha sector that won't open, but through it I can see the robot and hear the computer announce that the nuclear launch code is wrong, and warn that the manual override station in Alpha 2 is unmanned. I think I need to get there and override the launch manually to keep the robot from launching the missile.
 |
| Maximum pressure does nothing right now. |
The other end of the cross-corridor ends at a door into Epsilon sector that won't open, so I take the door going forward and proceed to the next door, which has a pressure lock. I have to decrease the pressure in the submarine dock in order to enter the room. Oddly enough, the verbal warning tells me not to increase the pressure to maximum, but nothing seems to happen if I do. It just seems to be something to slow me down, as I have to hold the down arrow for several seconds while the pressure slowly decreases far enough that the door will open.
The submarine dock holds a small pool and what looks like a large grabber arm. I think it's the same mechanical arm I noticed in the surveillance feed. I can't find anything I can interact with in this room. The side wall appears to have individual lockers with names on them, but none of them open. So I proceed into the next room.
 |
| Loading arm control screens. |
This appears to be a command post overlooking the loading arm. I can turn on the screens, one of which shows the layout of the loader arm room, and the other one gives me a "Loading Arm Menu"; "Choose Input Mode": "Manual" or "Programmed". If I select programmed mode and hit Activate, the arm moves forward, appears to grab, and then moves back. But there's nothing there, so I don't accomplish anything. If I select manual mode, I just get an error screen that says "Waldo Glove Disabled". Sometimes, anyway. Sometimes it does the exact same thing as programmed mode.
There's another exit from the command post, which leads to another short corridor bounded by doors, which then leads to another T corridor with exits to various sectors. The loading arm seems to be Delta sector. The cross-corridor again leads right to Epsilon sector and left to Alpha sector. Unfortunately, all the rest of these doors are locked due to the security alert.
 |
| How to fail the NORAD mission. |
Actually, the Alpha sector door is locked, but it also has a retinal scanner on it. When I trigger it, it says, "Please hold for ten seconds for Alpha sector retinal ID scan." I can back away to avoid the scan. If I stand still and let it scan me, it figures out that I don't belong there and triggers another security alert. I then hear that the nuclear missile has been launched, which fails the mission and causes me to be pulled back to the present automatically.
At this point, I got stuck. I didn't have any way through the door with the retinal scanner, and I hadn't found anything else to do in the NORAD area. Fortunately, Ilmari came to my rescue and confirmed that I had ended up in a walking dead scenario. I had missed something in a mission I did earlier. I am not pleased at the game design that allowed this to happen, but I'll save my detailed comments on that for the final rating. For now, Ilmari's hint pointed to the existence of another BioChip that I had failed to get from the robot at the Science Center, the first mission I completed. That meant some significant backtracking in order to fix my mistake. The rest of this post was written a few days after my initial exploration of the NORAD level above. |
| Retinal BioChip item |
I reload the appropriate save in order to go back to the science center after making the antidote. I quickly move to the electrical access room and electrocute the robot as I did before. This time, I carefully pull out all the BioChips that are available. The chip I was missing is, appropriately enough, the Retinal BioChip. (I have to wonder, though, how it manages to be effective. How can it know what an "acceptable vein structure" would be for any given retinal scanner lock? And why did the robot need it in the first place?) After returning to the Pegasus with six chips total, my score is at 50607.
 |
| How many BioChips can I grab in 3 seconds? |
Actually, I barely managed to get all of them first try, and then I accidentally killed the program before I saved, so I had to do it again. Then it took me three tries to get all the BioChips. The auto-destruct sequence triggers quickly enough that it's really not very easy to get them all. I don't think I commented on it in the original post, but the first time I played through the sequence, I only got the Optical Memory chip and didn't realize more than one could be taken. I'd already tried multiple times even to get two chips, and then it turns out I still didn't get them all. That sequence is probably the hardest sequence to get right in the whole game.
After getting the chip I missed, then I have to play through the entire Mars sequence again. I know what needs to happen, so it only takes about 25 minutes to do the whole level, although for some reason I have a little more trouble with the Mastermind mini-game this time around. Eventually I get through it, grab the bomb, work my way through the maze, carefully use the ore crusher, blast off in the shuttle, and capture the robot. I make sure to get all the chips from this one too, of course, although this one has a duplicate chip (the Mapping chip) for some reason. That's especially pointless given that it'd be more difficult to get through the ore tunnel maze without already having the Mapping chip.
After two missions cleared and seven BioChips, now I have a score of 76915. This is significantly higher than the score I reported at the end of the previous post (60560). This is probably a combination of the 5000 point increase for the extra chip as well as more points for being faster at completing the missions. I've done the first two enough times now that I know what's necessary and what isn't.
 |
| The retinal chip at work projecting a simulated retina for the scanner. |
Finally, back to the NORAD level. I start the same way as I did before, wearing the oxygen mask, and having the shield chip active when I face the robot's plasma blasts. I make my way through the pressurized room and along the corridors to the second Alpha door with the scanner. This time, I activate the Retinal chip before I trigger the scanner, and it does its thing.
The door opens to reveal the defense station. I walk in and trigger the screens. The left one shifts from a surveillance video of the other Alpha station to a close-up on the robot, who begins gloating at me about how he just broke the nuclear activation code and began the launch sequence for the nuclear missile strike. Am I too late? (Apparently the country it's aimed at is spelled Ghorbestan, although given all the typos, even that can't entirely be trusted.)
 |
| Apparently the writers couldn't spell "Addis Ababa" either. |
I have only one way to stop the missile launch: I have to play another mini-game where I race to shut down several missile silos in quick succession before time runs out. To do this, I have to click on the trackball below the globe to move the cursor around the globe and select the correct silo site. Then a button appears on the right screen to deactivate it. Each time a silo is deactivated, the installation selects a different site, and the amount of time I have to deactivate it decreases, starting at two minutes and decrementing by 10 or 15 seconds each time down to only 30 seconds for the last one.
 |
| The US has eight silos (nine including Hawaii), but I only have to deactivate one of them. |
I like this minigame in one way, because it requires some knowledge of geography. It just gives you a city and country, and you have to navigate around the globe to find the correct red dot that corresponds to that location. Some of the locations are reasonably uncommon, like Bangkok, Thailand. Some aren't even capital cities, like Bonn, Germany, although there's only one dot anywhere in the vicinity of Germany, so that hardly matters. The globe is tiny enough on the screen that there's not enough resolution to really make it interesting. I doubt that Pegasus Prime actually did this, but I could certainly imagine a remake that could offer difficulty levels by using more common or less common locations for the silos.
What I don't like about this minigame is the fiddly control of the trackball, though. The difficulty should be primarily in identifying the correct location, but instead, most of the difficulty is in actually selecting the location. The trackball is incredibly imprecise. Most of the time I found myself sliding back and forth around the vicinity of the right dot, trying to get the selector to stop in the right place. The mouse is way too sensitive in the game as it is, and the clicks are no better: often when I just need a single click to shift the selector over a small bit, it acts like I clicked and held for a moment, sliding it too far.
 |
| I've prevented the missile launch by deactivating too many silos. |
Eventually I manage to get a bit better at controlling the selector, enough that I never run out of time. The robot tries to taunt me several times, telling me I'll never succeed, but I get the impression it's getting a little alarmed as I continue deactivating silos. After at least eight different silo locations, I reach the end. The screen shows a new message: "Maximum deactivation allotment exceeded. Global launch override safety feature engaged. ALL SILOS DEACTIVATED."
Now I've really made the robot angry. It's coming for me, so I'd better find a way to stop it like I did the other two. (As far as I can tell, though, it never shows up if I just wait in the Alpha sector.) I start making my way back along the corridor toward the original end of the station.
 |
| I'm trapped unless I deal with the robot right here. |
I am not very surprised to encounter the robot once I step into the room just before the pressurized submarine dock. I look through the door and see it coming toward me. Once it's in front of me, I'm not allowed to move or turn away any more, so the only thing I can do is use the pressure controls. Well, low pressure won't do anything, but what about maximum pressure? I was warned that maximum pressure is pretty strong - is it stronger than a robot? Apparently yes! The robot crumples like a tin can. The door opens, and again I get a look at the robot's chips as it prepares to self-destruct. This one doesn't have anything that isn't a duplicate, though.
 |
| Mission complete. |
And that's the end of the mission. The missile launch has been prevented. All I needed was the retinal chip, and then I played one minigame and solved one puzzle, and that's all. But before I go on, I'm going to go back and do the last puzzle a different way.
 |
| The loading arm grabs the robot. |
When I get into the control room, instead of turning to face the robot at the door, I continue forward to the control station for the loading arm. Then when I face the room, the robot comes over to the window and starts pounding on it. It also taunts me again: "What do you think this is, human? A game?" (It didn't talk when it was at the door.) As quickly as I can, I trigger the loading arm screen, select Automated, and hit Activate. The arm reaches out, grabs the robot, and smashes it through the window, destroying it, and the mission completes as before.
So one of these solutions should be the "violent" solution, and one should be the "peaceful" solution. But honestly, both of these seem about equally violent to me. Both result in the destruction of the robot, and the loading arm solution also results in damage to the window. For next time, I'll complete the game both ways to find out which one is which.
BioChips: Interface, Mapping, Pegasus, Optical Memory, Retinal, Shield, Trace
Other inventory: Transport Card, Journeyman Key, Tranquilizer Dart, Antidote, Stun Gun, Wire Cutters, Maintenance Key, Access Card Bomb, Oxygen Mask
Time travel trips: 4
Score: 98570
Session Time: 1 hr 30 min
Total Time: 7 hr 15 min
Again there are typos in my screenshots! I called out the Addis Ababa one, but there are at least two others. Who can find them?
Deaths: 3 (total: 19)
 |
| Finding out first-hand how the colony was destroyed. |
#17: (Thanks to MorpheusKitami for alerting me to this death.) I didn't try this last time, but if you don't take care of the bomb before entering the mining tunnels, then it will explode, destroying the colony. The ending is called "Explosion of Mars Colony": "Your expert sleuthing abilities have led you to the discovery of what actually happened to the Mars Colony." I assume we blow up with it.
 |
| Sure looks like the robot won this round with the door. |
#18: If you wait too long at the door, the robot will eventually break it down. Somehow the robot is strong enough to break down a steel pressure door, but not strong enough to withstand the pressure that the door can withstand? Maybe it punches through it. Or maybe the writers were confused about this too. This ending is "Crushed by Robot": "Not even a 2000 lb. steel pressure door could keep the robot from losing this round. Winner by TKO: the robot." Right, so did the robot win or lose? I guess the lack of proofreading extends beyond just spelling errors.
 |
| The picture should really show Agent 5 with the oxygen mask on. |
#19: If you wait too long at the window by the loading arm controls, the robot will eventually break it down too. This time, we're "Killed by Robot": "Next time you should have a plan before confronting a two-ton robot who wants to see you dead." So that means the robot weighs twice as much as that pressure door.
Note Regarding Spoilers and Companion Assist Points: There's a set of rules regarding spoilers and companion assist points. Please read it
here before making any comments that could be considered a spoiler in any way. The short of it is that no points will be given for hints or spoilers given in advance of me requiring one. Please...try not to spoil any part of the game for me...unless I really obviously need the help...or I specifically request assistance. In this instance, I've not made any requests for assistance. Thanks!